
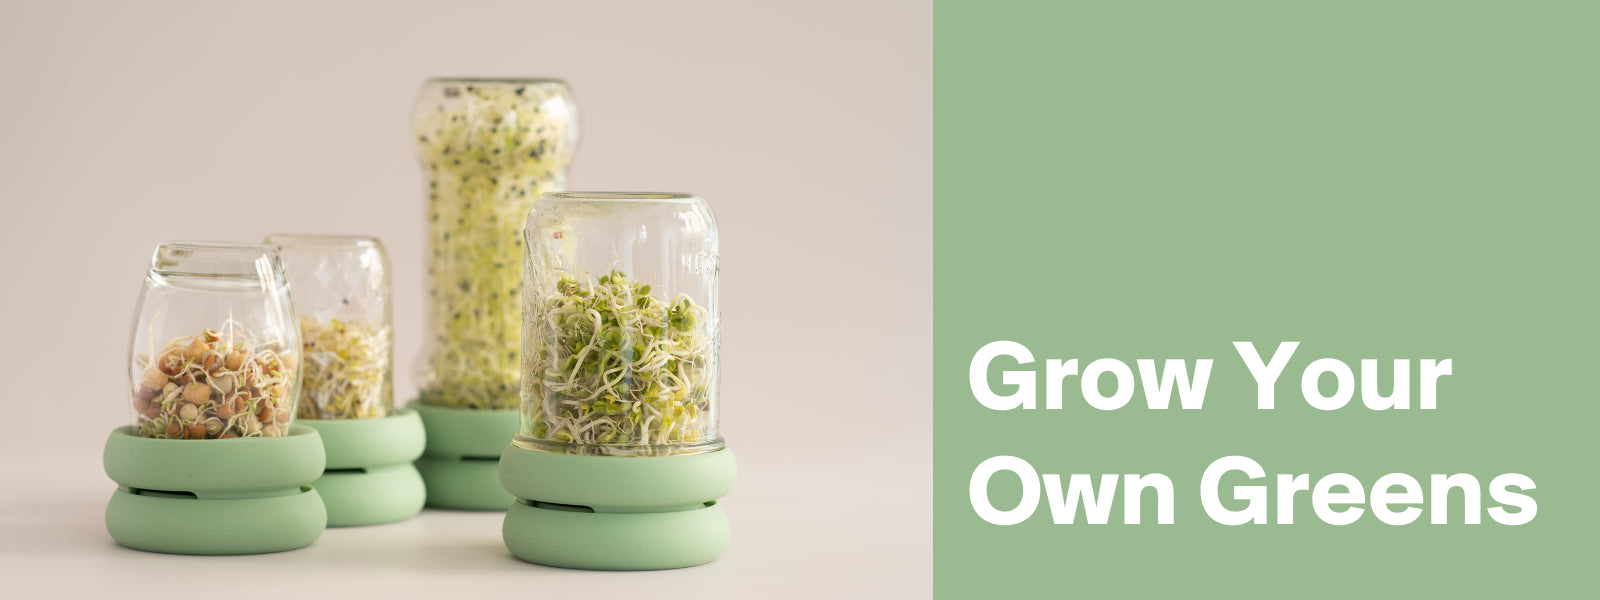
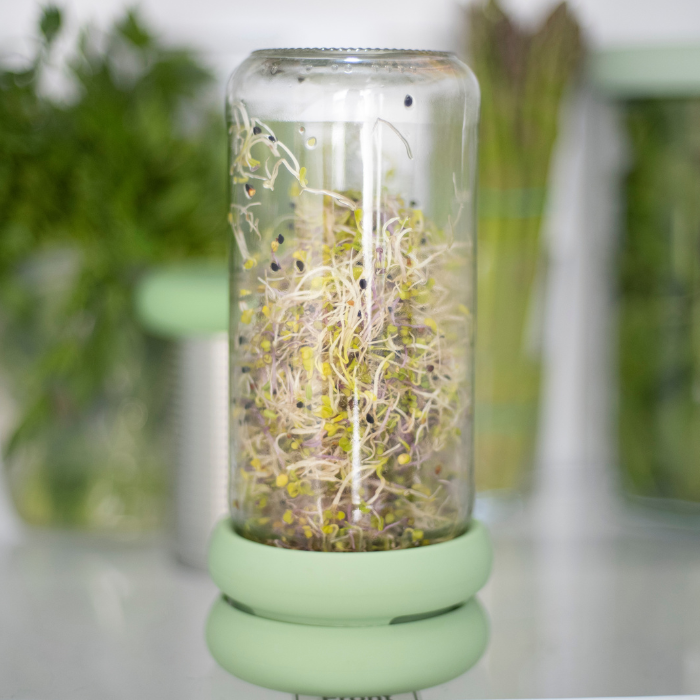
Introducing Sprout Huggers
Our affordable, eco-friendly solution for growing your own fresh and nutritious sprouts right in your kitchen. With a snug seal and sturdy stand, Sprout Huggers make mess-free sprouting a breeze
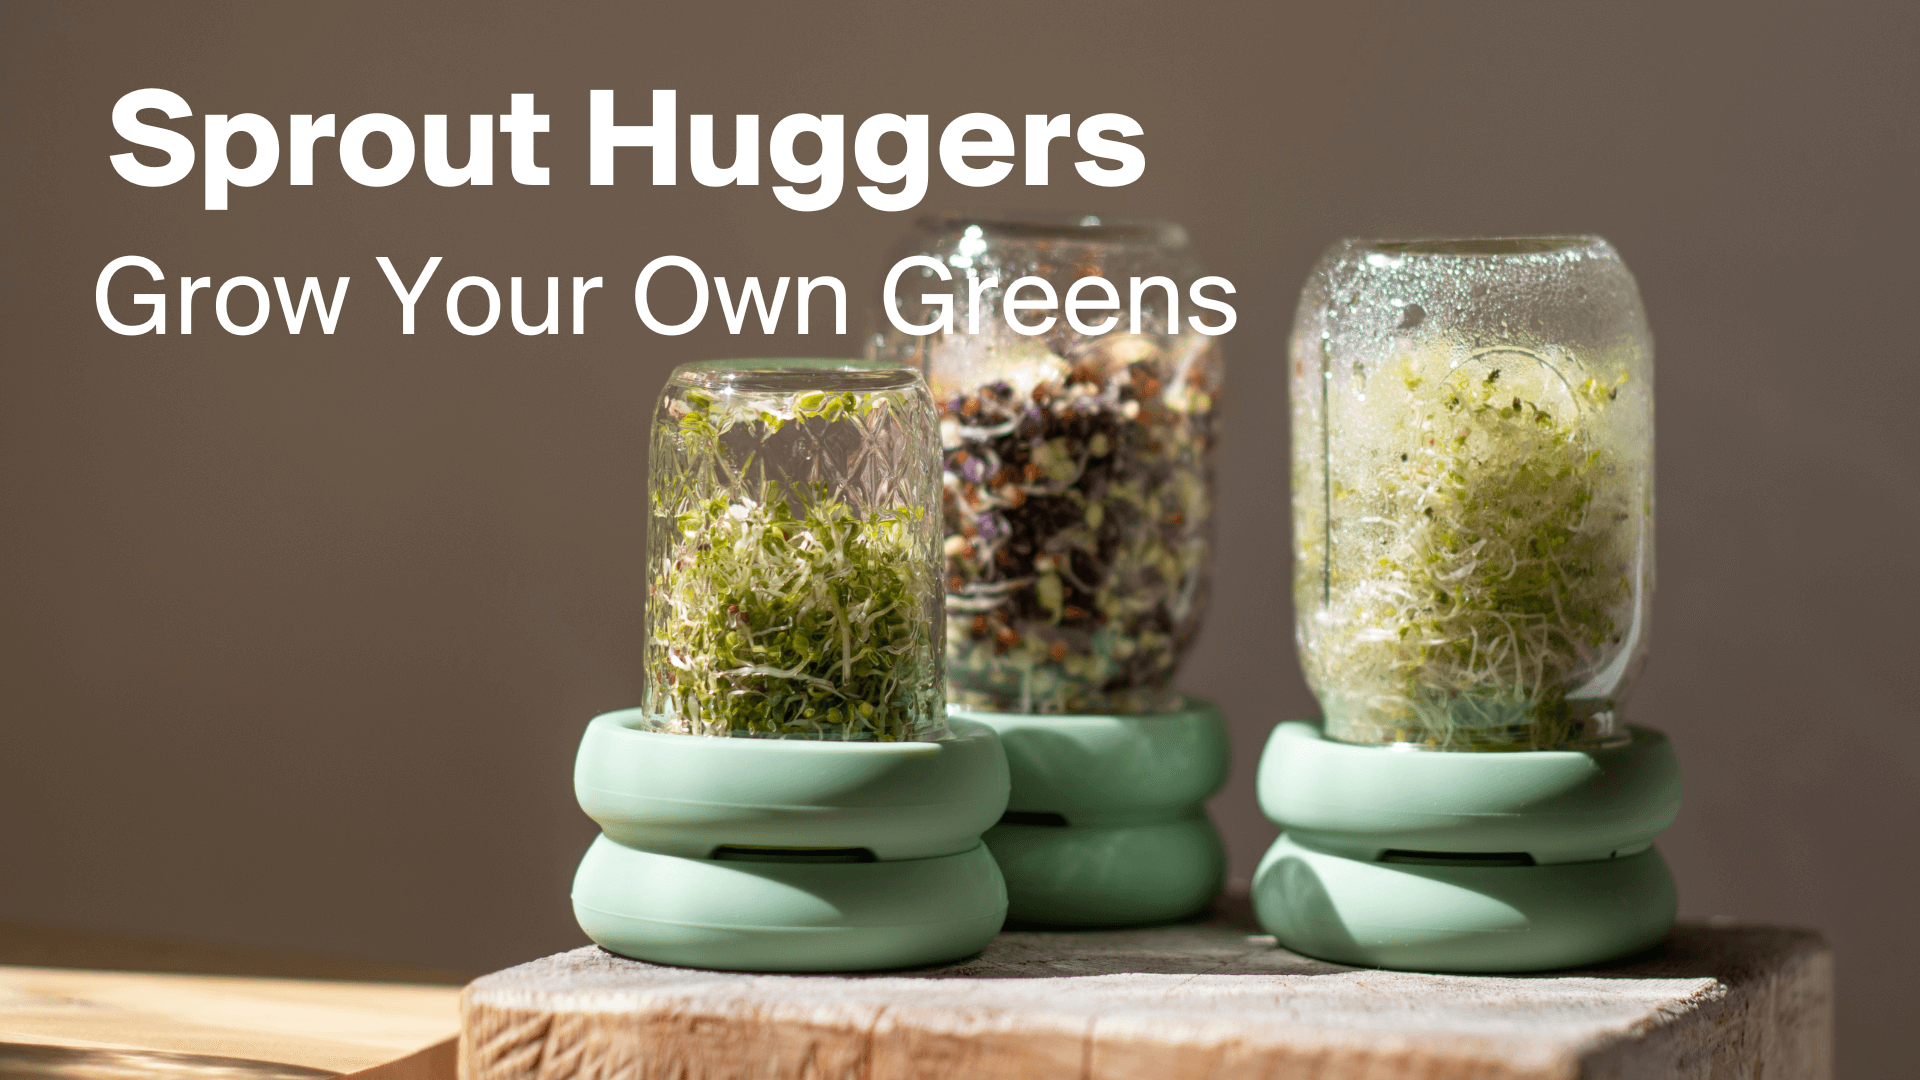
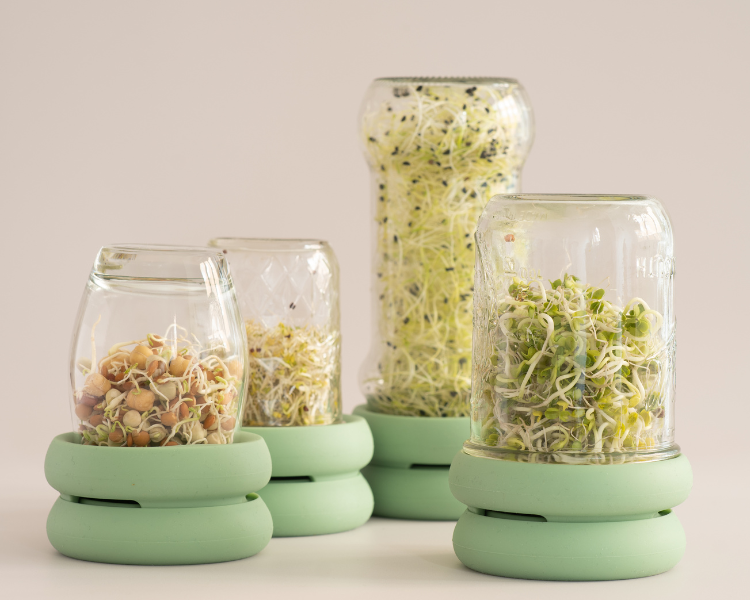
Fits Standard Jar Sizes
Sprout Huggers are made with flexible food safe silicone that will snugly fit over standard jar sizes (both standard and wide mouth mason jars). If you've got a few jars you're looking to reuse and repurpose, growing your own sprouts is incredibly rewarding.
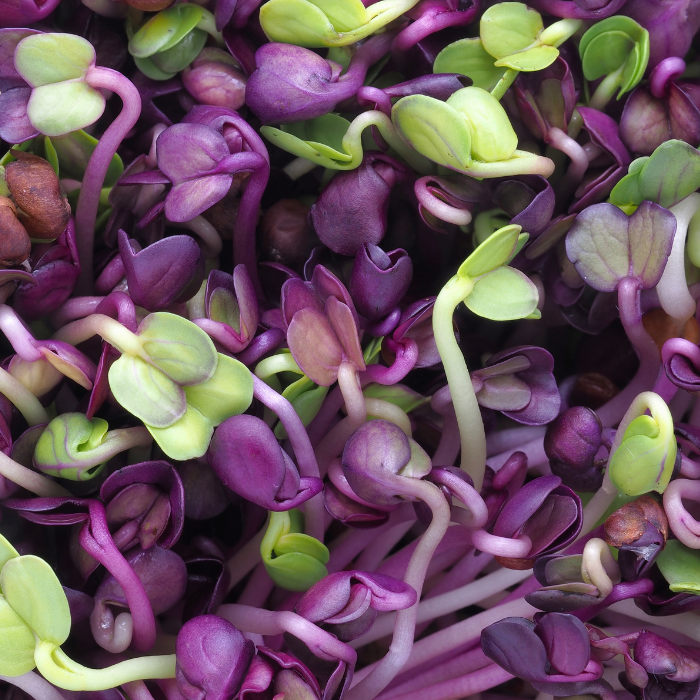
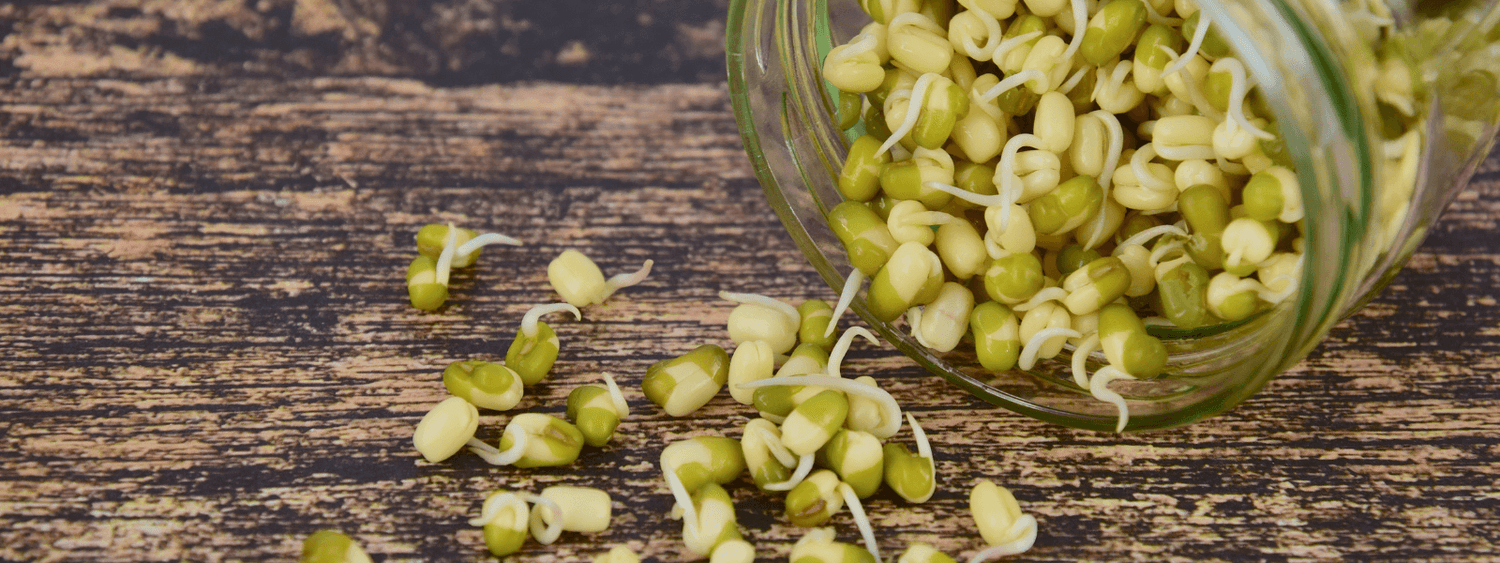
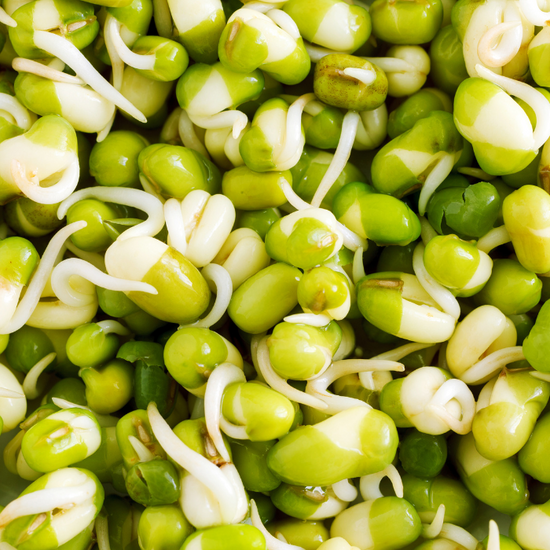
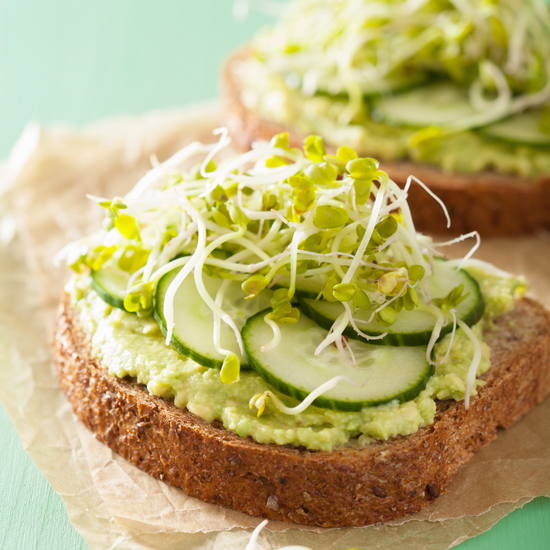
The tiny but mighty superfood you can grow at home
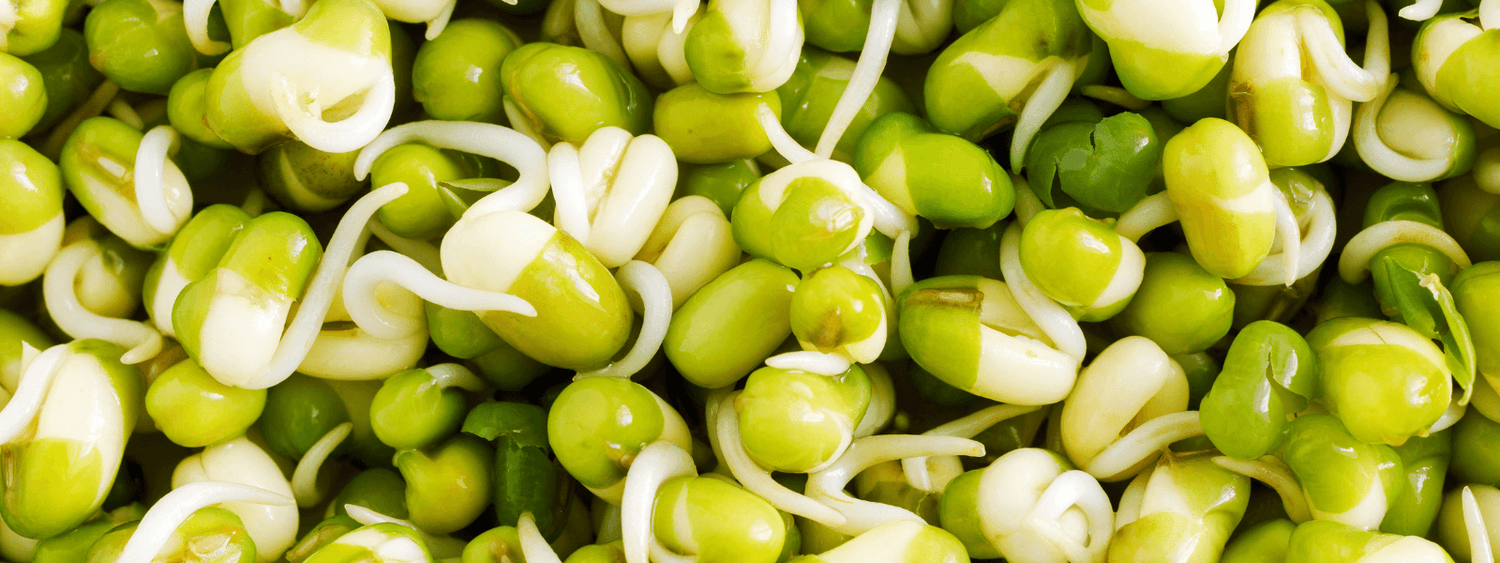
Sprouted seeds and beans are supercharged sources of vitamins, minerals, enzymes, fiber, plant protein and calcium. Sprouts are a fantastic addition to any diet and growing them at home makes it easy to always have some on hand.
Statistics that Inspired Us
-
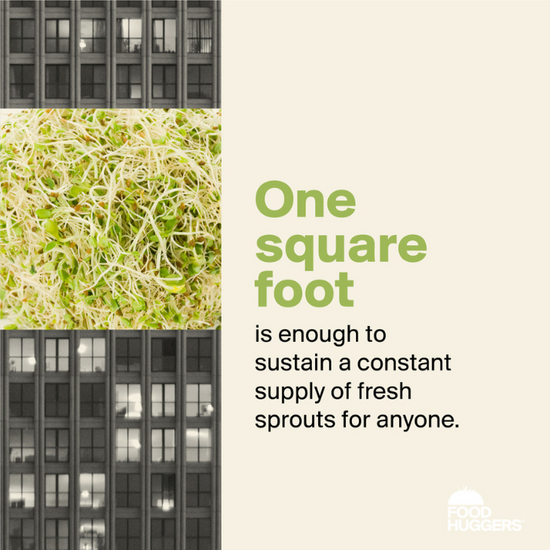
One square foot of counterspace is enough to start your own home garden
-
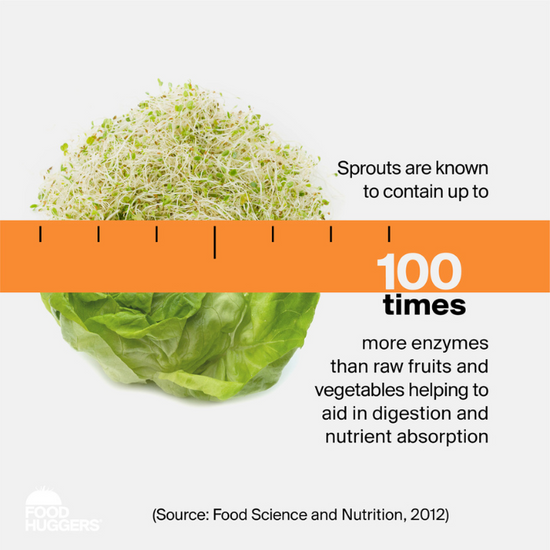
Sprouts are incredible powerhouses of nutrition for all of us who need more greens
-

Growing greens at avoids the carbon of packaging and transportation
-
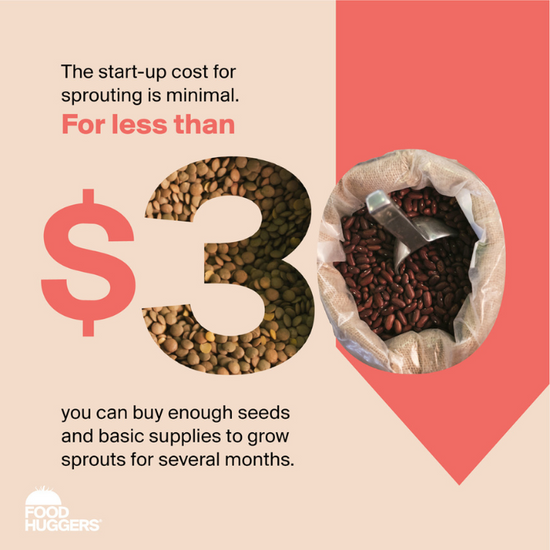
While grocery prices are skyrocketing, sprouting is a fantastic and frugal way to get great greens while reducing your grocery bill.


How to Use Sprout Huggers
-
Step One: Select Your Seeds
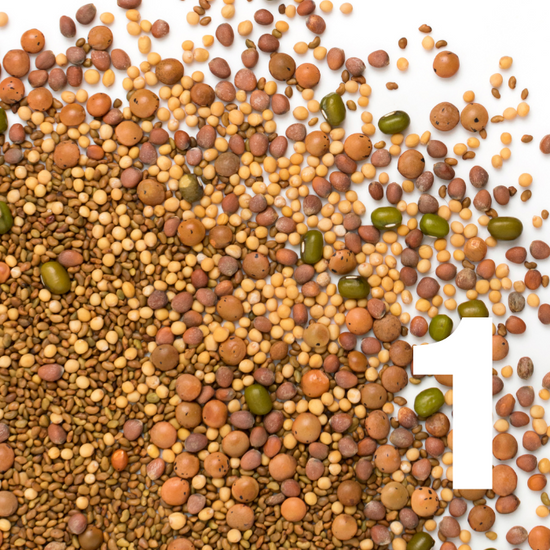
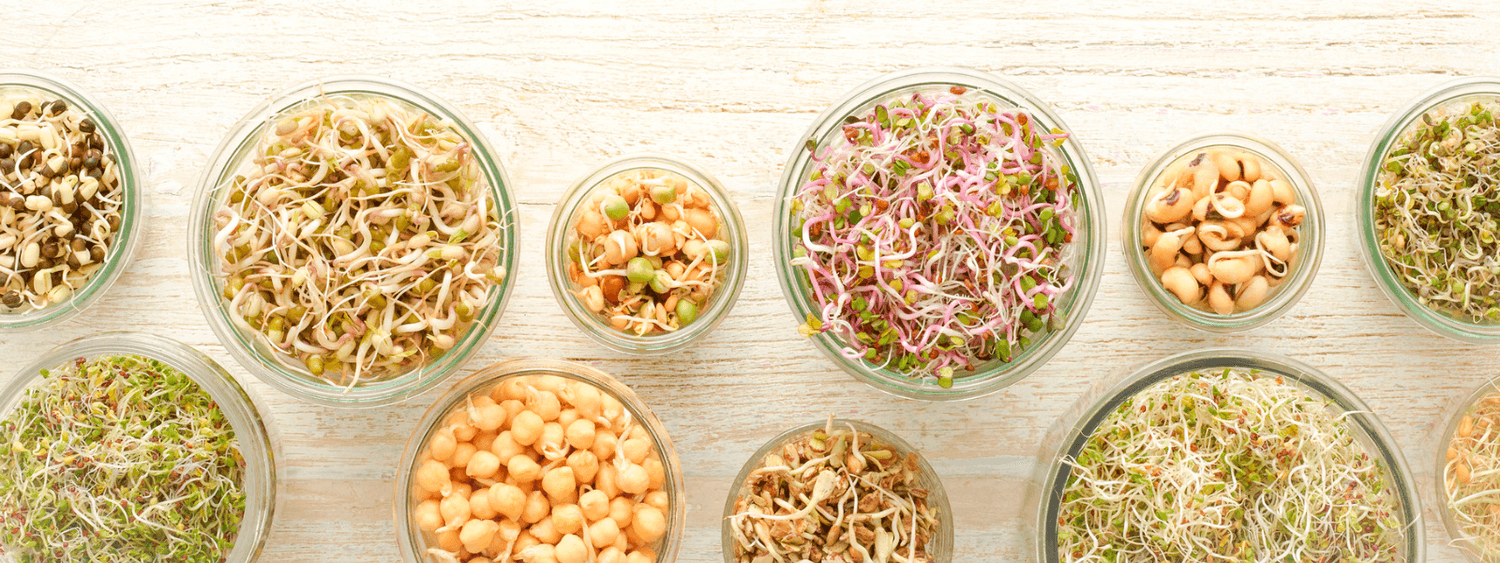
There are hundreds of different seed and bean types you can sprout. Sprout Huggers work best with medium to large sized seeds and beans. If you are not sure where to buy seeds, we recommend some sources and resources below.
-
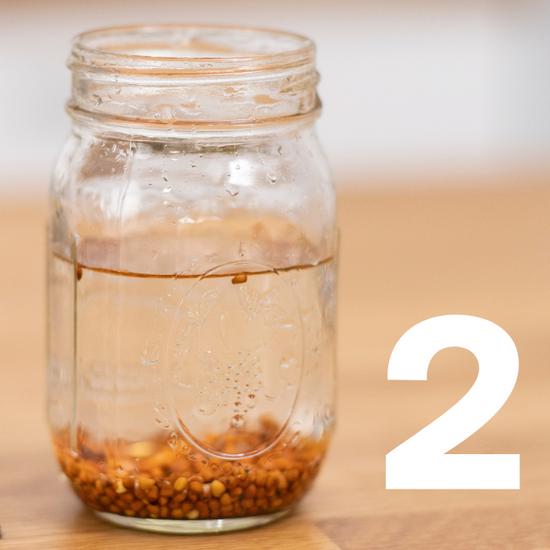
Step Two: Soak Your Seeds
Most seed sprouting starts with soaking for 6-8 hours or overnight.
-
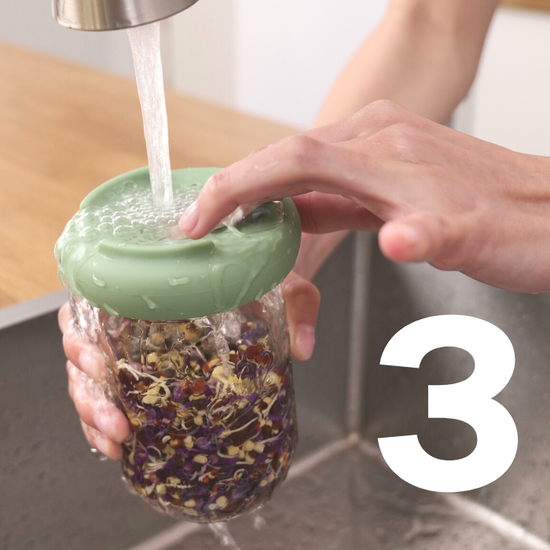
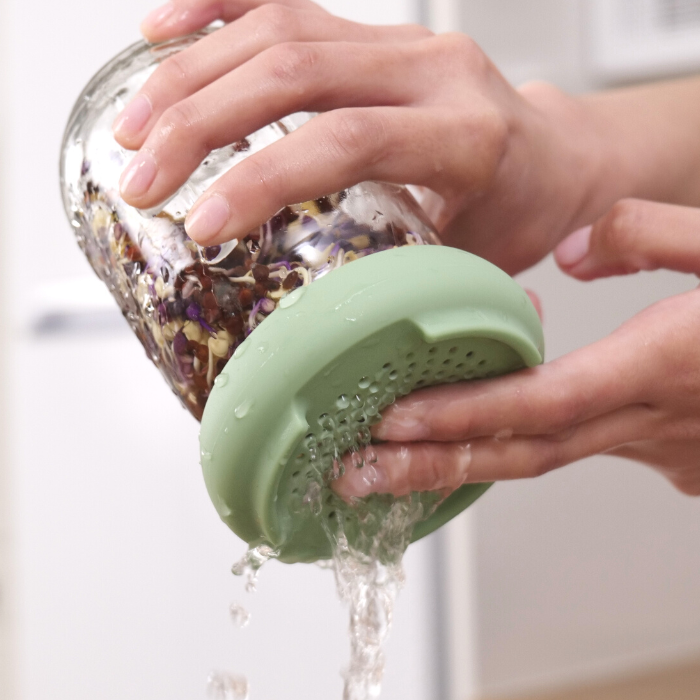
Step Three: Rinse Your Seeds Regularly
After soaking, drain and rinse your seeds a few times before placing your jar and Sprout Hugger upside down on the reservoir
-
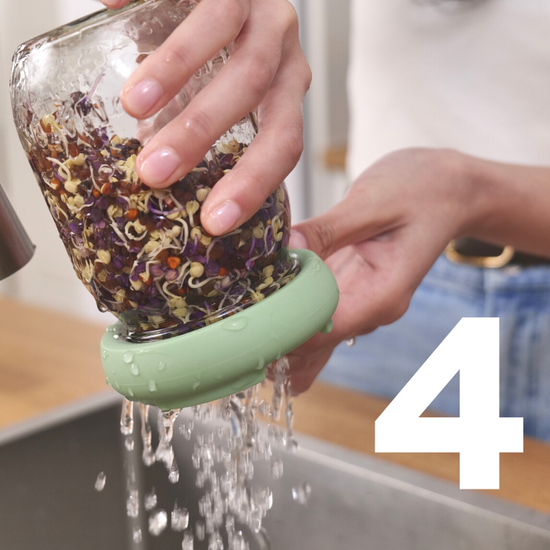
Step Four: Drain
Tilt the jar to drain the water. Tapping the center of the mesh helps to remove the last bits of water After each rinse, place your jar on the sprout hugger base to catch any excess water.
-
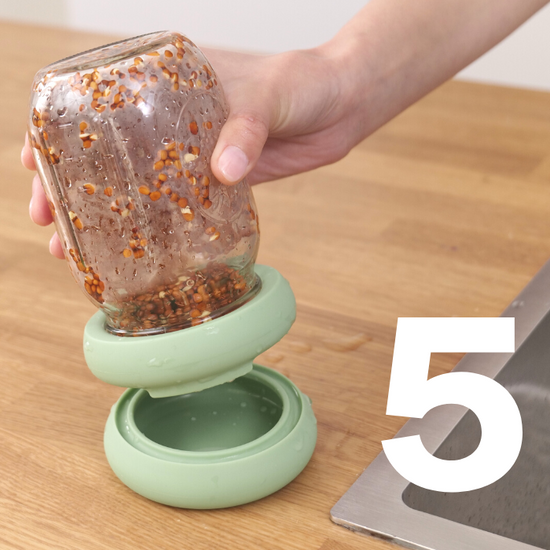
Step Five: Return to the Reservoir
After each rinse, place your jar on the sprout hugger base to catch any excess water. Most seeds need a day or two in the shade to get started. But then you can move them into the sun to get even more nutrients.
-

Step Six : Soak in the Sunshine
Follow instructions for your selected seeds for when to move them into the sunlight. Enjoy watching them grow! When your sprouts are ready, rinse them thoroughly in a bowl of water and skim off any unsprouted seeds. Lay sprouts out to dry (tea towel works best) and then store in the fridge when dry.


Our Inspiration
Sprout Huggers are for anyone who wants to supercharge their diet with fresh, sustainable, and budget-friendly greens that pack a powerful nutritional punch. With Sprout Huggers, you can grow your own fresh greens from start to finish in just 7 days. By using Sprout Huggers, you minimize packaging waste, and enjoy the rewarding feeling that comes with homegrown produce. Try Sprout Huggers today and start reaping the benefits of sprouting!
You'll need Seeds and a Jar
Sprout Huggers do not come with seeds, so you'll need to buy these separately. The agricultural expertise required to cultivate and distribute sprouting seeds is something that's best done by those who know. The companies below are a couple sources to get you started.
Rinse & Repeat
Rinsing is a crucial step in the sprouting process. Sprouting seeds need a bit of moisture in order to grow properly. BUT if they sit in water for too long, they can become waterlogged and even develop mold or other bacteria.
By rinsing your sprouts frequently (once or twice a day) you're not only providing them with the hydration they need, but you're also flushing away any excess water. Rinsing also helps to aerate the sprouts, which is important for their growth and overall health.
Think of it like taking care of a little plant baby - you want to make sure it's getting the right amount of water, but you don't want to drown it! So, please be sure to rinse your sprouts often and give them the TLC they need to thrive.
Your Questions Answered!
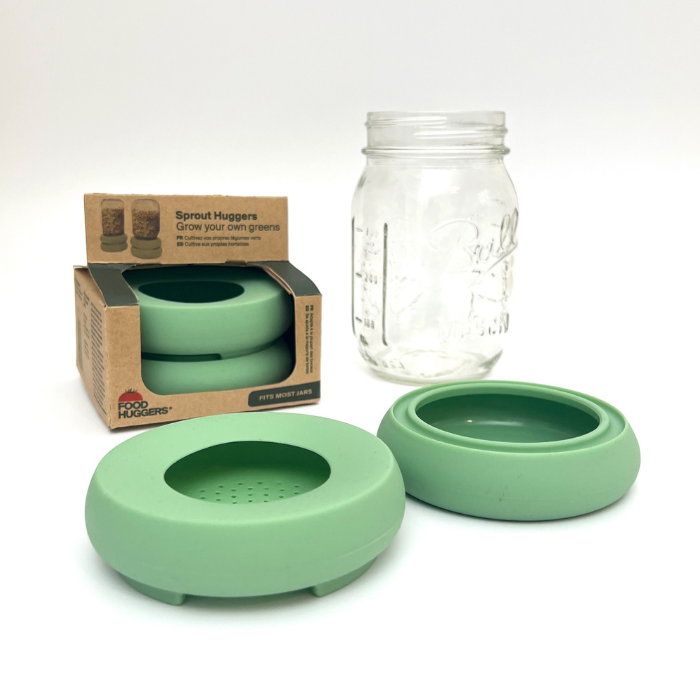
What's included in my Sprout Hugger Set?
Each Sprout Hugger set comes with two silicone parts. A draining lid that fits over the opening of your jar, and a reservoir that catches any drips of water so that your counter stays clean and dry.
Where can I buy seeds for sprouting?
You can buy seeds from your local garden center and some organic grocery stores. There are some seed resources listed above also.
What are the benefits of eating sprouts?
Sprouting offers several benefits, both in terms of nutrition and practicality. Here are some key benefits of sprouting:
- Enhanced Nutritional Content: Sprouting seeds, grains, and legumes increases their nutrient content. Sprouts are rich in vitamins, minerals, enzymes, and antioxidants. The sprouting process activates enzymes that enhance nutrient availability, making sprouts a concentrated source of beneficial nutrients.
- Increased Digestibility: Sprouting breaks down complex carbohydrates, proteins, and fats, making them easier to digest and absorb. It also reduces anti-nutrients like phytic acid, which can interfere with mineral absorption. This improved digestibility makes sprouts gentler on the digestive system.
- Concentrated Enzymes: Sprouts are abundant in live enzymes that aid in digestion and other bodily processes. Enzymes help break down food, making nutrients more accessible and supporting overall digestion and nutrient absorption.
- Alkalizing Properties: Many sprouts have an alkalizing effect on the body. They can help balance pH levels and counteract the acidity caused by certain foods, promoting a more alkaline and balanced internal environment.
- Antioxidant Power: Sprouts are packed with antioxidants that help protect the body against damage from free radicals. Antioxidants can support overall health and reduce the risk of chronic diseases.
- Versatile and Convenient: Sprouts are versatile additions to a variety of dishes, including salads, sandwiches, wraps, stir-fries, and smoothies. They add a fresh crunch and boost the nutritional value of meals. Growing sprouts at home is also a convenient way to have a constant supply of fresh greens within reach.
- Cost-Effective: Sprouting seeds and legumes at home is an economical way to add nutrient-rich food to your diet. The initial investment in sprouting supplies is minimal, and the sprouting process allows you to yield a large quantity of sprouts from a small amount of seeds.
- Sustainability: Sprouting seeds at home reduces the need for transporting and packaging pre-sprouted greens, thus decreasing carbon emissions and waste associated with commercial distribution. It's a sustainable way to enjoy fresh, locally grown greens year-round.
Why is regular rinsing so important?
Regular rinsing of sprouting seeds is crucial for maintaining proper moisture levels, promoting oxygenation, preventing dryness or waterlogging, removing waste, and reducing the risk of mold or bacterial growth. It is an essential step in the sprouting process to ensure successful and healthy sprouts.
I'm new to sprouts. Where can I learn more?
SproutNet (www.sproutnet.com): SproutNet is a comprehensive resource dedicated to sprouting. It offers a wealth of information on various sprouting techniques, troubleshooting tips, nutritional benefits, and even provides a directory of sprouting seed suppliers.
Sprout Guide (www.sproutguide.com): Sprout Guide is an online platform focused on sprouting. It offers detailed articles and guides on various sprouting methods, equipment, seed selection, and troubleshooting. The website provides practical information to help beginners get started with sprouting.
Does the Sprout Hugger work for all seeds and beans?
The holes in the drainage cap are suited for medium to large sized seeds and beans. Broccoli seeds (for example) are so small that they can pass thru the holes and we suggest combining the Sprout Hugger with a pieces of cheesecloth if you are using extremely small sized seeds.
Read Our Sprouting Blog Post
From big cities to rural towns, Sprout Huggers give everyone the sustainable tools they need to reap the benefits of home-grown greens again and again — creating a win for their wellness, their wallets, and the planet.
More Sprouting Resources
-
Sprout People
Learn MoreThis website offers a wealth of information on sprouting, including tips for getting started, sprouting recipes, and information on the health benefits of sprouts.
-
Our Plant Based World
Learn MoreThis website provides a diverse list of recipes that will help you enjoy loads of creative and delicious meals using the sprouts you have grown yourself.
-
TheSpruceEats.com
Learn MoreThe Spruce Eats has a section dedicated to sprouting, with articles on topics such as how to grow sprouts at home and the different types of sprouts you can grow.


